For those of you who aren’t comfortable following the compute example for aws (I have no idea what I am doing for half the steps), and are happy with something simpler - google cloud made it easier recently to have your virtual machine (VM) spin up on a weekly schedule.
I will explain how in the steps below.
Step 1. Adding the metadata to the VM config that starts your program
This program should fetch the numer.ai data, run the predictions, and submit those predictions to numer.ai in any way of your making, and shuts down the VM afterwards.
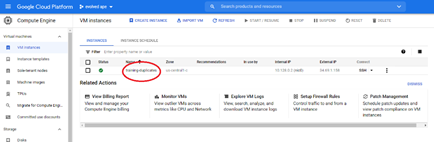
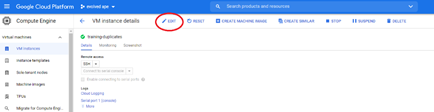
To add the metadata click on the name of your VM, and click edit
Scroll down and add a metadata entry called “startup-script”, and add your own variant of the startup script you see in the image.
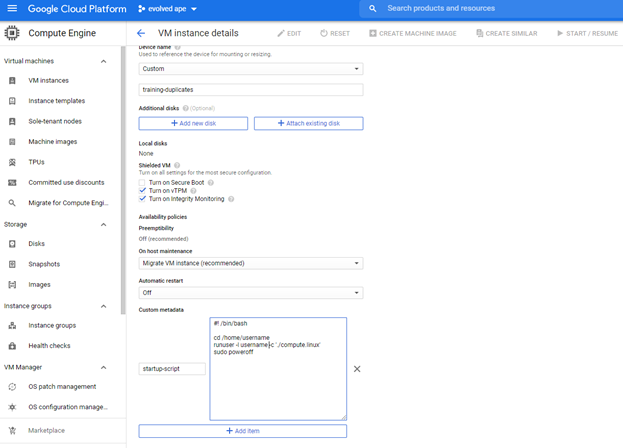
The script I have added there is as follows
#! /bin/bash
cd /home/username
runuser -l username -c ‘./compute.linux’
sudo poweroff
What it does is go to your user directory --do remember to change username with your actual google cloud username!–, and run your program.
As the startup-script is run by the root user, the first it has to do is switch to the username home directory and invoke your program from there. In this example, the program is a script called compute.linux, and for good practices, we don’t run the program as root but as a user.
Remember that the program is responsible for everything numer.ai related - fetch the data, generate the predictions, and submit the results.
After the program has run its course, the startup-script invokes a “sudo poweroff” to shut down the instance. Note that if the program hangs for some reason, your instance is not shut down!
Step 2. Schedule your VM to start once a week.
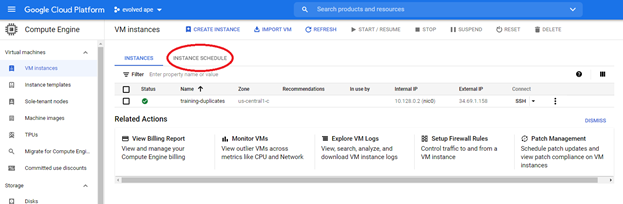
Not so long ago, google added an instance scheduler to their compute engine, and it is now trivial to set a weekly schedule for your VM, so that you can submit your predictions every week while on holiday ![]() . First click on instance schedule, and then click on create schedule.
. First click on instance schedule, and then click on create schedule.
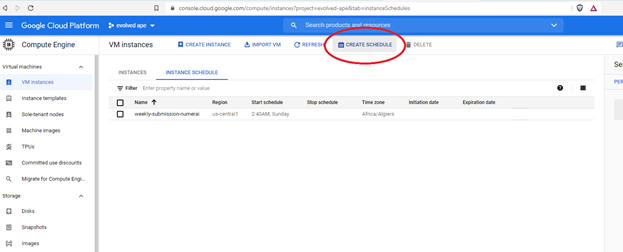
You see that I already have a named schedule there, but I will go through the process of making another one here.
When you click create schedule, you get the following tab.
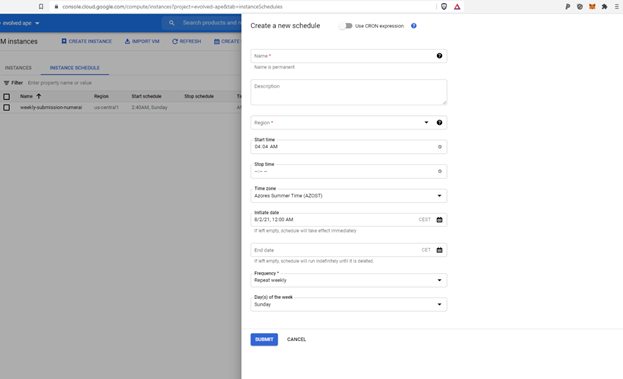
What is important for you is to select the same region as your VM is from, and then select a start time/time zone, an initial date from whence forwards the schedule becomes active, the frequency, and when you pick weekly, also the day of the week that your VM is started.
I picked a starting hour that is a few hours later than when the new data typically becomes available. If numer.ai is a bit late in uploading their new weekly dataset, my program isn’t caught trying to predict and submit last week’s predictions again!
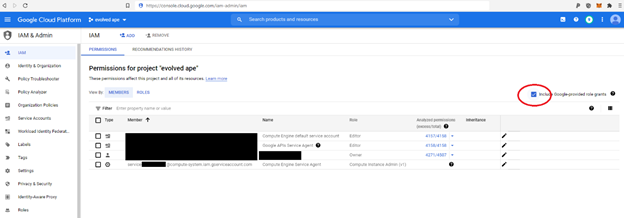
Step 3. Give your schedule permission to start a VM
Now you have to make a small detour to https://console.cloud.google.com/iam-admin/iam, which is where you can give your schedule permission to start your VM.
Your first action is to click the little box marked in red below, and that will make your compute engine service agent show up. Edit its permissions by clicking the pencil to the right, and add the role of Compute Instance Admin (v1) to the service agent account.

Well done. Just one more step!
Step 4. Back to the VM page, and attach the schedule to your VM
Now, go back to your VM instances page on google cloud, and in the instance schedule tab, click on the weekly schedule that you created.
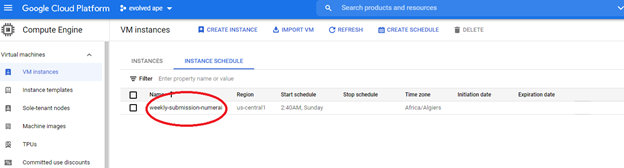
Now you can add your VM instance to your schedule without errors on permissions.

And congratulations! You are set! You have got something similar to numer.ai’s AWS compute working, but on google’s cloud - which seems better tailored to people that think of the cloud as ssh’ing into a linux box and running a program, rather than fancy stateless functions and docker images ![]() .
.